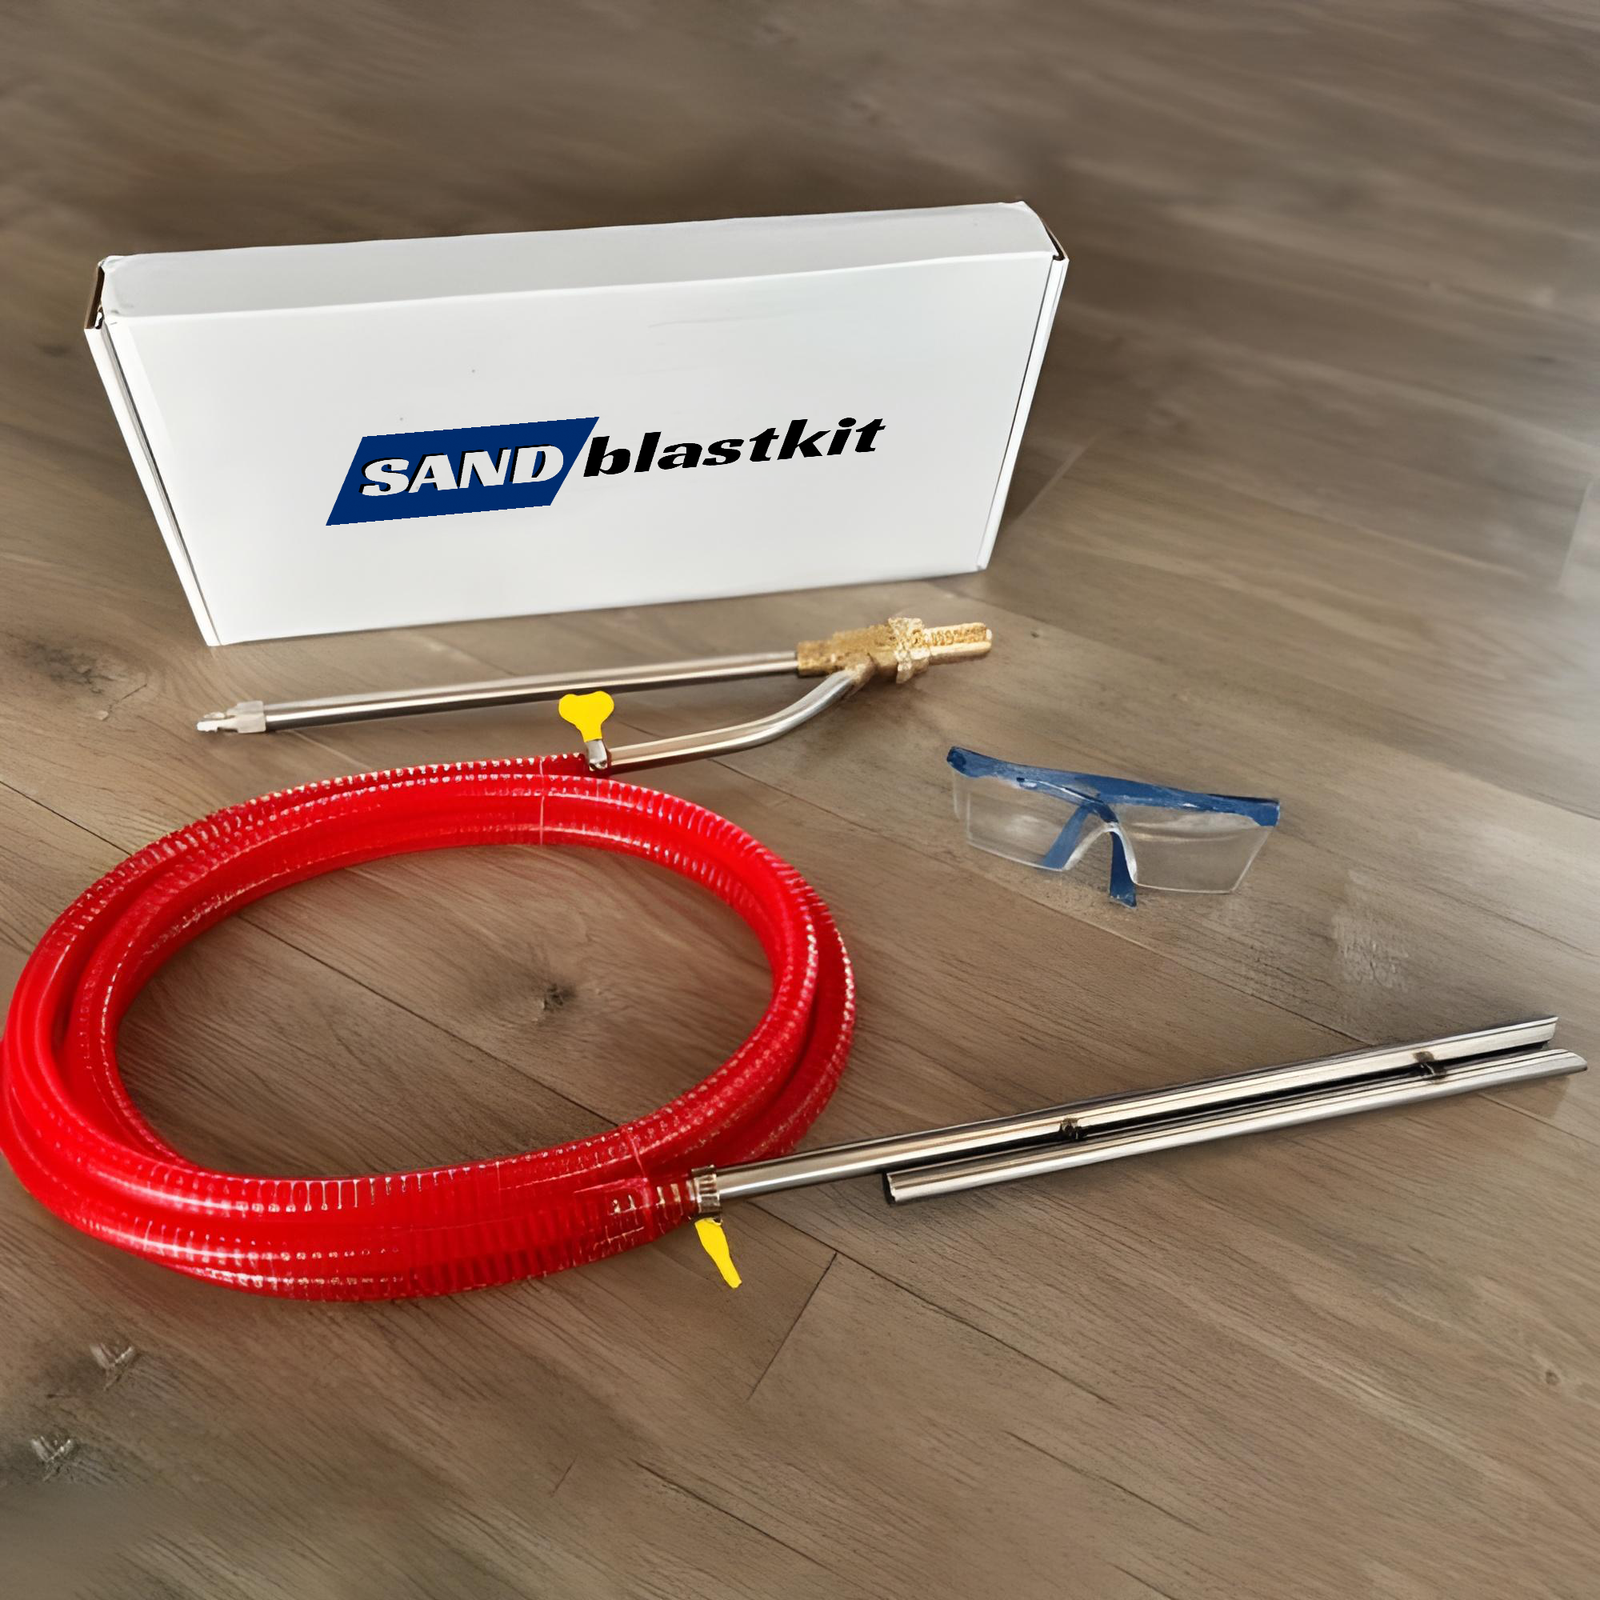
Sandblastkit Step-by-Step Guide
The Ultimate SandblastKitPro™ Master Guide
Sandblasting is one of the most effective ways to clean, strip, and prepare surfaces for restoration or refinishing. Whether you're removing rust from metal, preparing wood for repainting, or restoring automotive parts, using the right techniques and tools will make all the difference. This guide covers everything you need to know to get professional results, avoid costly mistakes, and maximize the performance of your sandblasting kit.
- Proper Setup
- Choosing The Right Media
- Safety & Control
- Getting The Most Out Of Your Kit
- Preventing Flash Rust
- Reusing And Saving Media
- Deep Cleaning
- Finishing
- Maintenance And Long-term Care
- Real-World Pro Tips
- Complete Performance Bundle Recap
- Troubleshooting Common Issues / FAQs
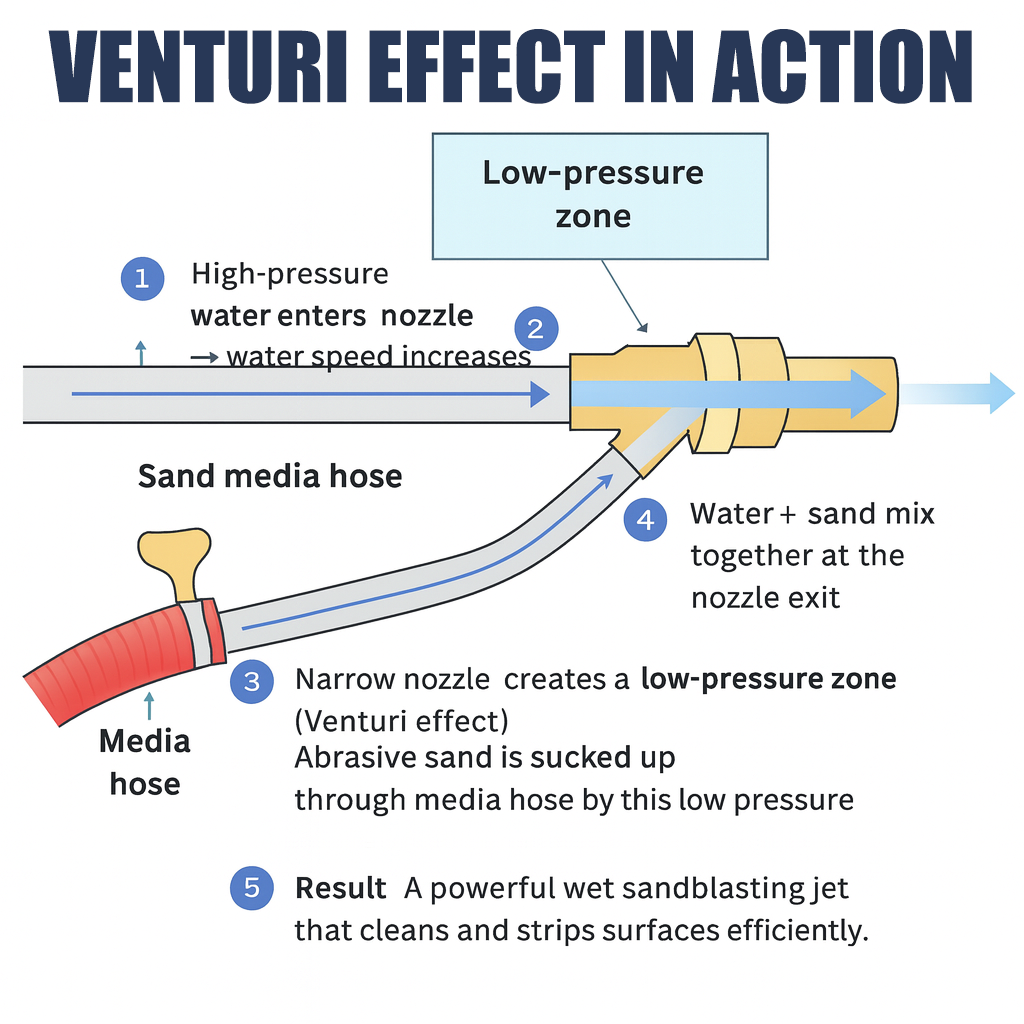
Most clogging or poor suction comes down to moisture or angle errors.
- STARTING: Always pull the trigger and get the wand spraying before placing the suction head into the sand.
- STOPPING: Take the suction head out of the sand first, then release the trigger on the wand.
- Raise your sand bucket about 3 feet above the ground to improve suction (gravity assist).
- Keep the sand hose upright (around 12 o’clock position).
-
Dry, filtered sand = smooth flow — even one wet clump can choke the system.
Pro Tip: Use your Sand Filter/Sifter before every blast session. It removes rocks, damp spots, and debris that cause blockages.
Bonus Tip: If you’re blasting outdoors, cover your bucket. Moisture in the air is your worst enemy.
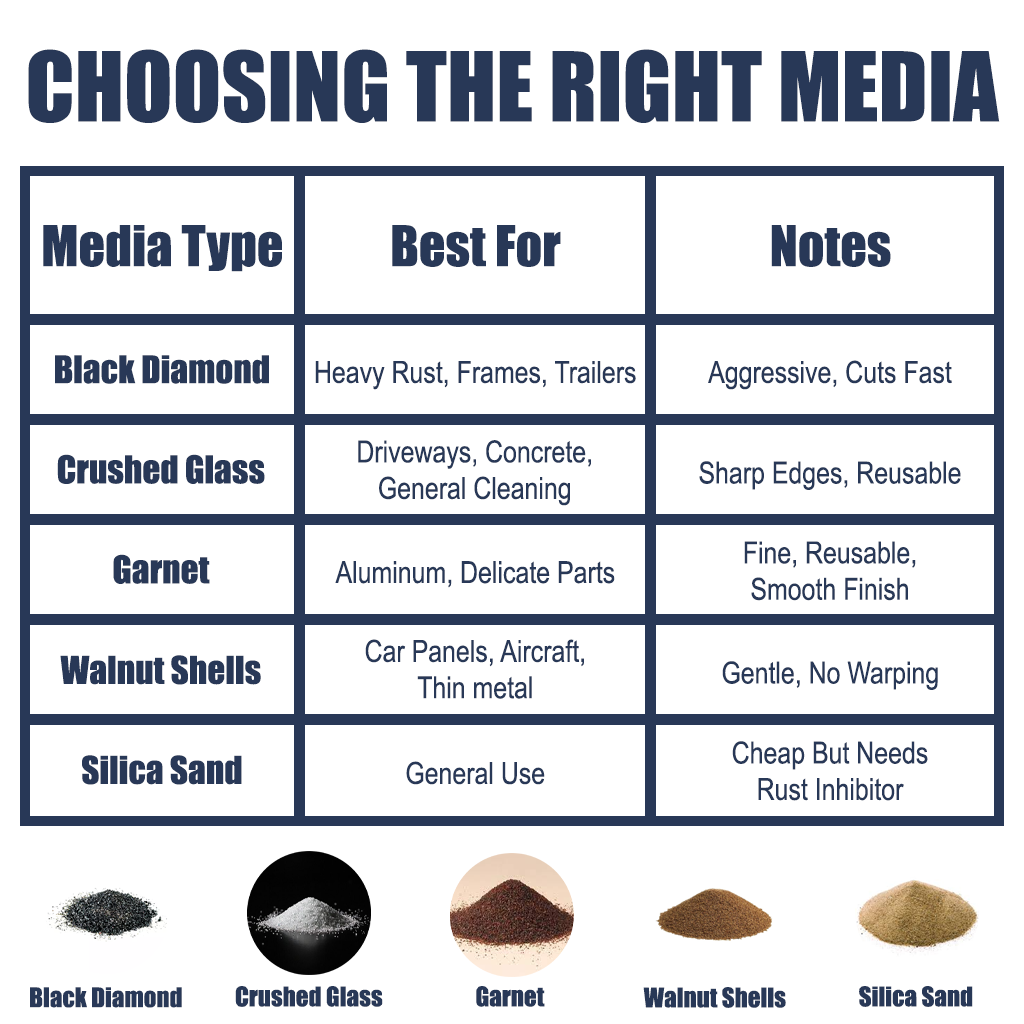
Different jobs = different blasting media. Using the wrong one can pit or glaze your surface.
⚠ Avoid: Play sand or beach sand — they’re too smooth or too damp, and clog easily.
Match your blast profile to the coating you plan to use. Epoxy primer needs a deeper profile than topcoat prep.
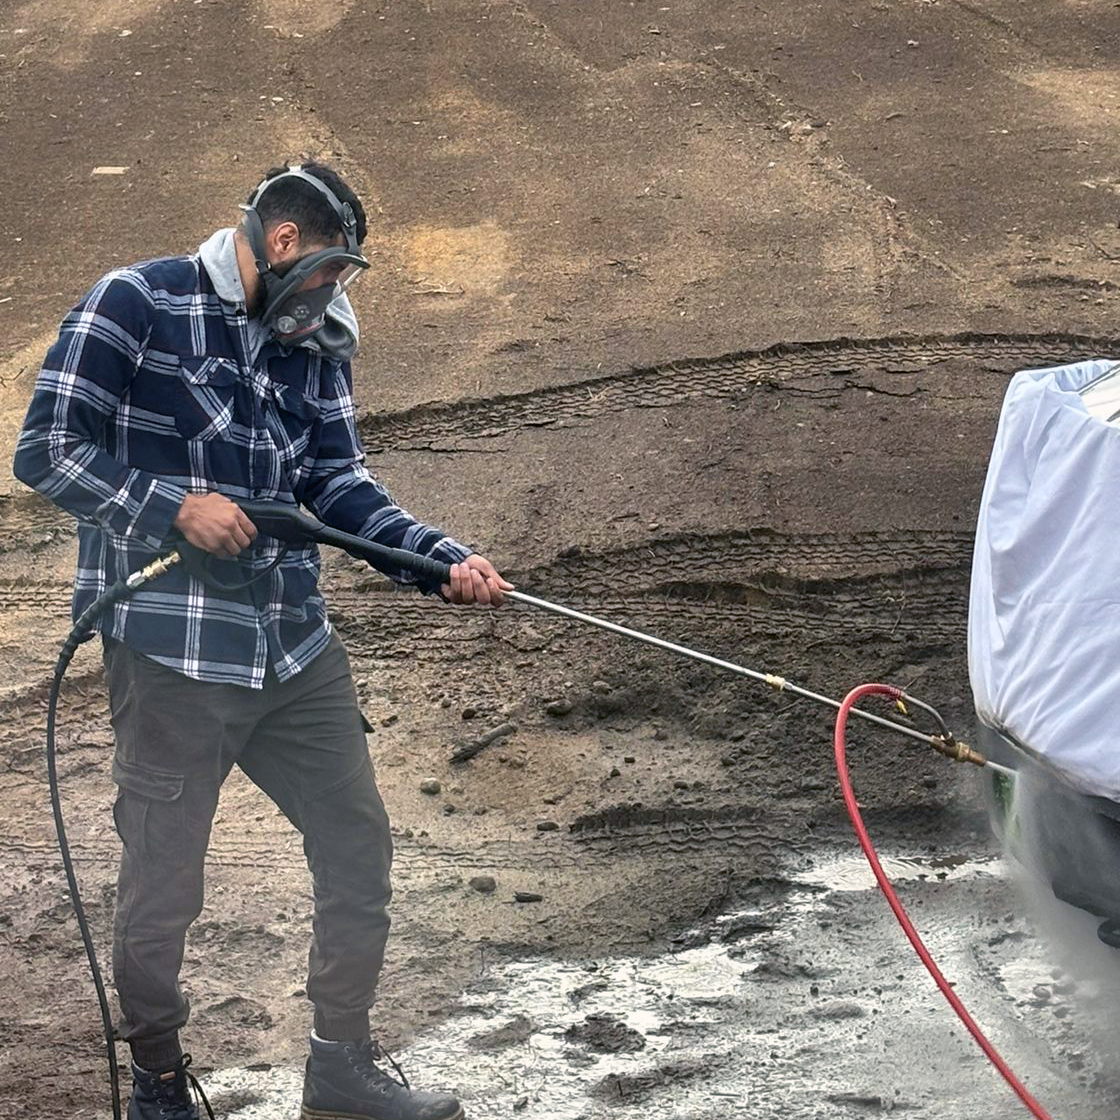
Wet blasting is messy, and rebound spray is real.
Stay comfortable and safe while keeping visibility clear.
Use the Protective Facemask — it keeps water mist, grit, and dust off your face, while preventing fog so you can actually see what you’re doing.

- Angle the wand slightly off-surface for best results — direct hits can overheat panels.
- Short continuous passes beat stop-and-go motions (prevents streaks).
- Adjust the black knob on your washer’s pump to regulate water flow for ideal suction.
Want stronger blasting force?
Swap your stock gun for the High-Pressure Washer Gun. It boosts PSI and comes with interchangeable tips for more targeted control — ideal for thick rust or heavy coatings.
Using multiple washers or setups?
Add the Washer Gun Adapter Kit — it fits nearly all major washer types and prevents leaks or pressure drops.
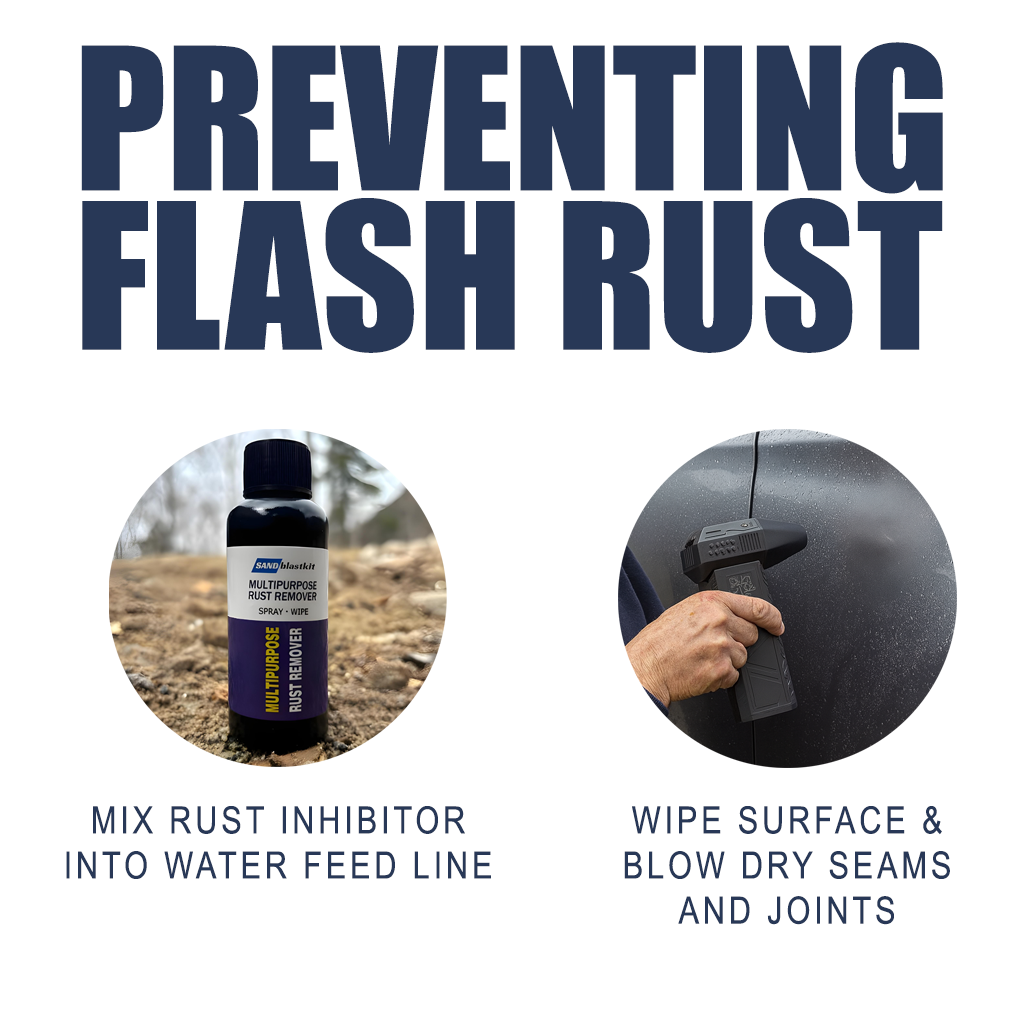
Even fingerprints can leave rust prints.
Mix Rust Inhibitor directly into your water feed line (1 oz per gallon).
This prevents oxidation for up to 72 hours — giving you plenty of time to prime or paint.
If not coating right away:
- Wipe surfaces dry.
- Blow air into seams and joints to prevent trapped moisture.
Use the Mini Cordless Turbo Jet Blower to dry quickly — especially around bolts, rivets, and frames where water hides.
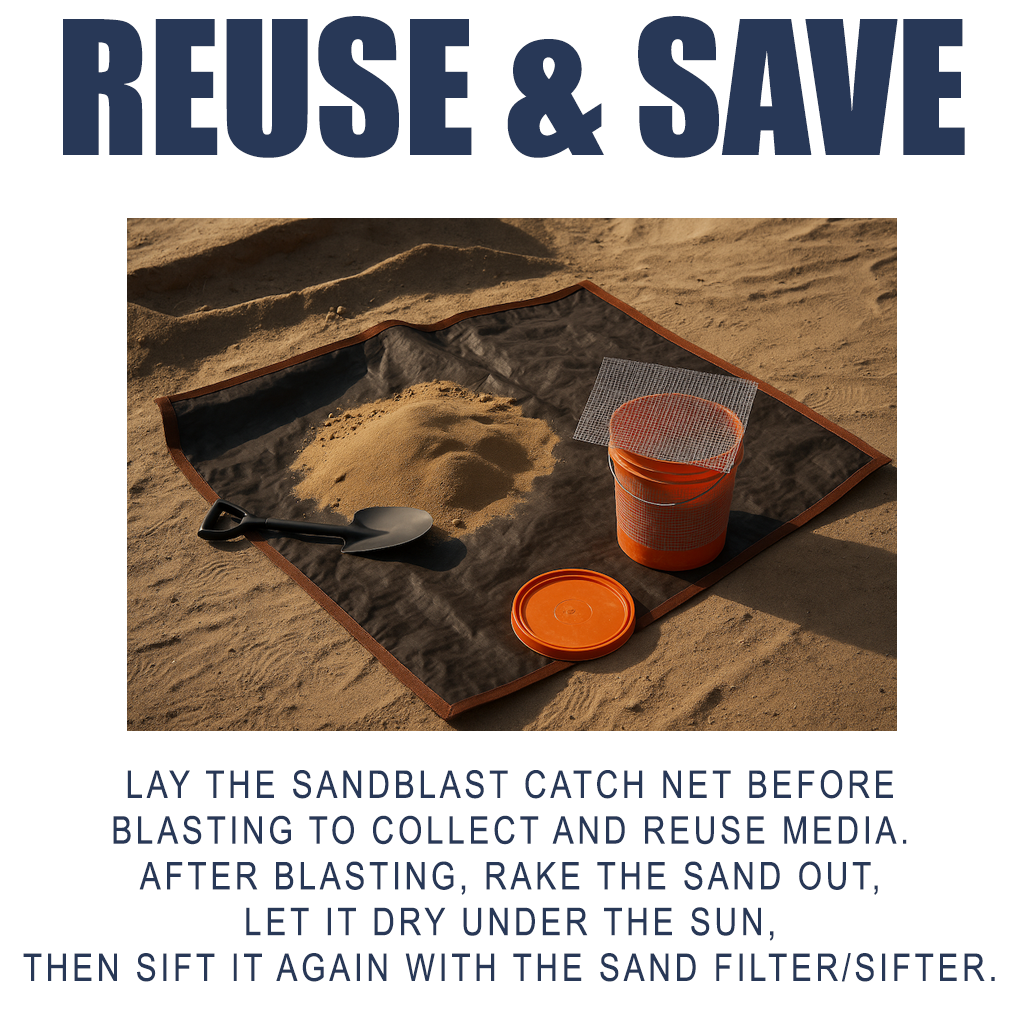
Sand adds up. A single session can use multiple bags, but with the right setup, you can reuse 70–80% of it.
Lay the Sandblast Catch Net under your work area to collect and reuse media.
After blasting, rake the sand out, let it dry under the sun, then sift it again with the Sand Filter/Sifter.
Pro Tip: Store reclaimed sand in a sealed metal container — moisture is the enemy of suction.
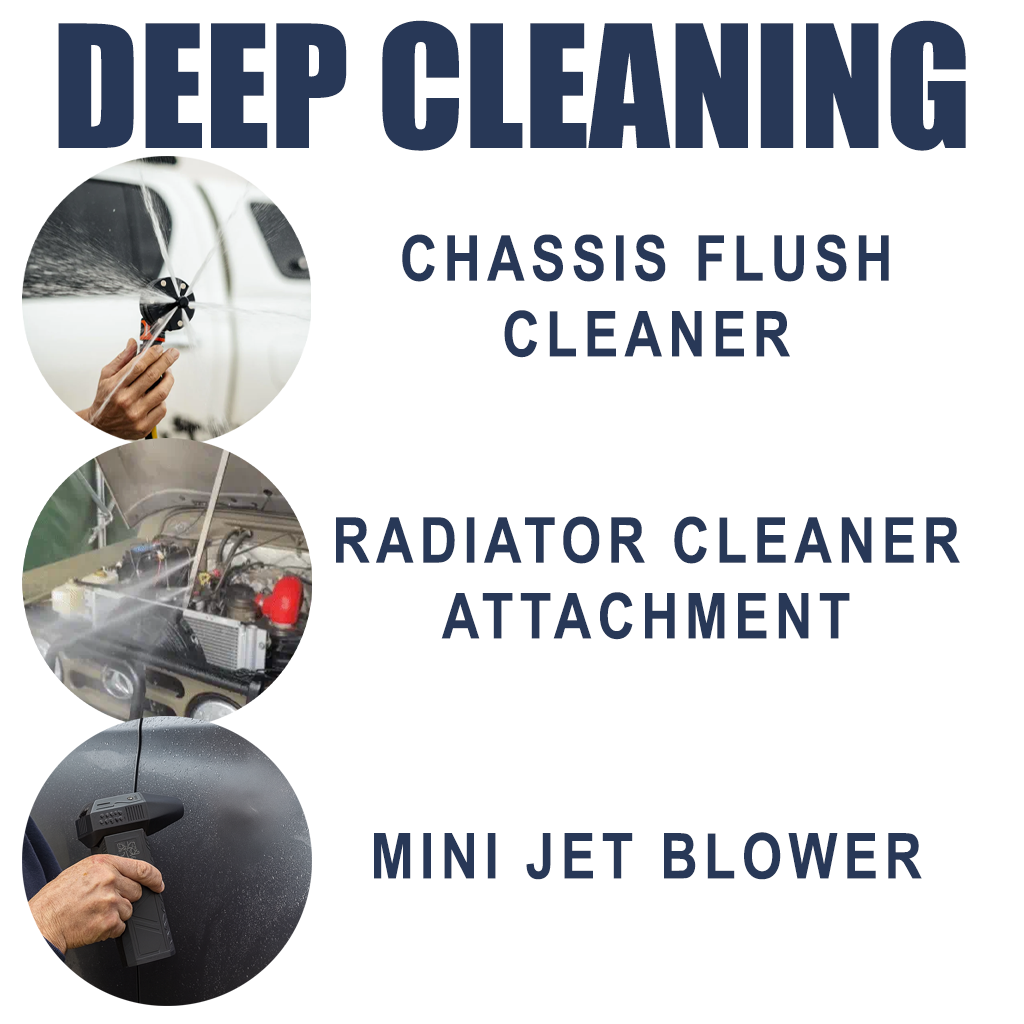
Blasting media loves to hide in places you can’t see. If it stays there, it can cause corrosion later.
These tools make sure your cleanup is complete:
- Chassis Flush Cleaner — plugs directly into chassis drain holes to flush out trapped sand inside frames.
- Radiator Cleaner Attachment — super thin, fits between fins to clear out grit after blasting near engine bays.
- Mini Jet Blower — blows sand out of crevices, panel gaps, and corner welds.
“Clean metal isn’t just about what you see — it’s what you don’t leave behind.”
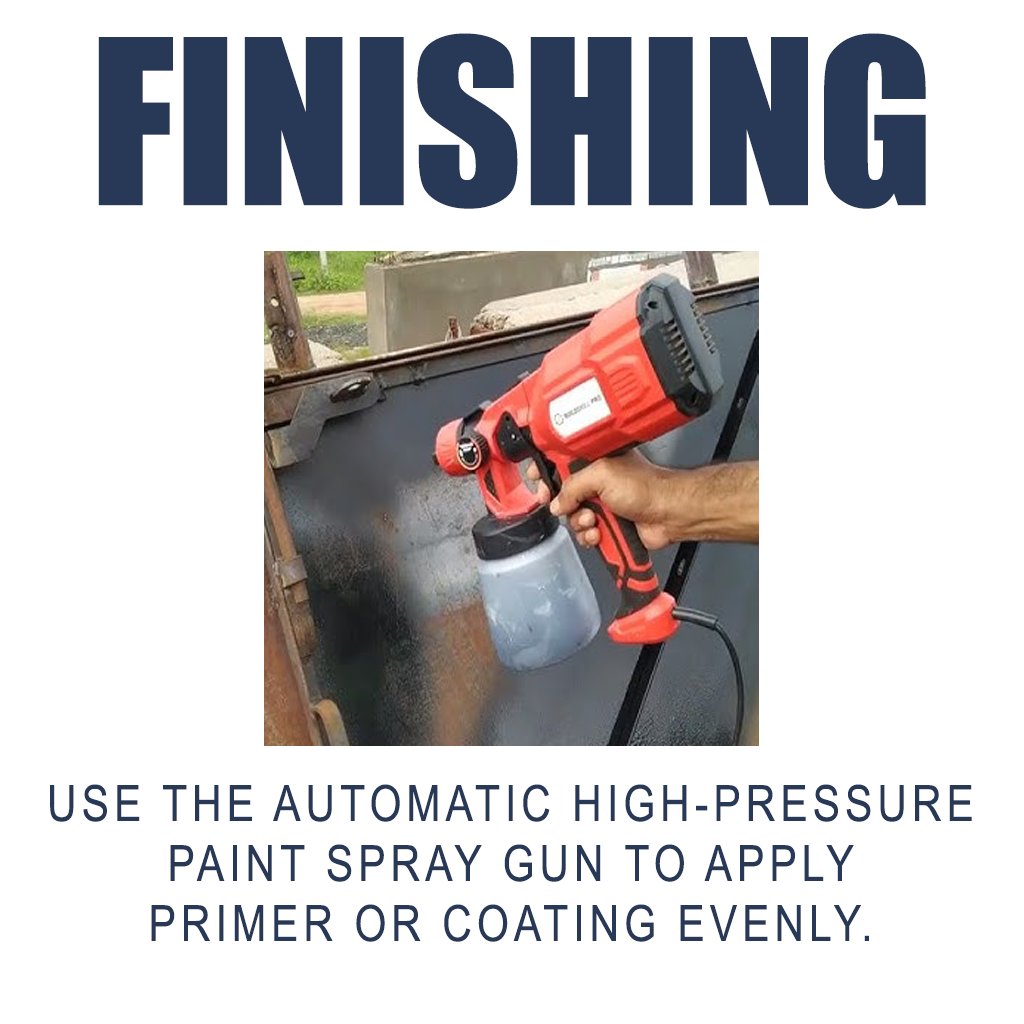
Once your surface is clean and dry, seal it fast.
Use the Automatic High-Pressure Paint Spray Gun to apply primer or coating evenly.
It's portable, easy to use and lays down a smooth, professional-grade coat in less time.
If you prefer to coat manually:
- First use vinegar/water (1:4) to etch the steel.
- Rinse with baking soda/water to neutralize.
- Then apply oil or primer immediately.

- Always remove the sand hose before turning off the washer.
- Rinse the nozzle after every use.
- Blow out remaining sand with your Jet Blower.
- Store your nozzles and accessories in a dry, sealed bag or container.
Keep spare Ceramic Nozzles — they’re the workhorses of the system and wear naturally over time.
Real-World Pro Tips (From Experienced Users)
Each of these insights came straight from real users — the same type of people you’re about to impress with your results.